You can achieve a whole new look for your countertops using paint. Besides giving your countertop a new look, painting the countertops could also help you save the money you could have spent buying new countertops. 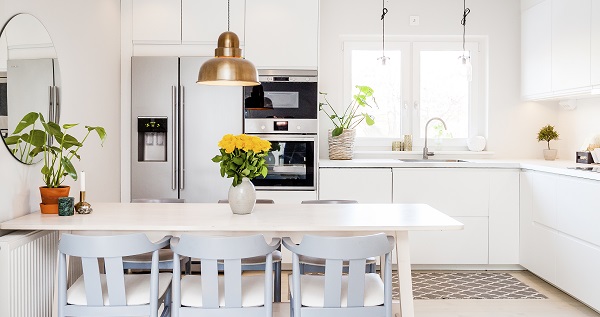
Painting your countertops is an opportunity to explore various designs and color mixtures. However, you must ensure that your countertops are composed of paint-friendly material. Certain countertops, such as quartz or granite, cannot be painted. Read more about these types of countertops at https://www.caesarstoneus.com/blog/quartz-countertops-vs-granite-the-big-debate/.
Steps on How to Paint Your Countertops
You have to follow a systematic procedure when you decide to paint your countertops. In doing so, you get to achieve the best possible results out of a painting job. There are about four basic steps to follow when learning how to paint your kitchen countertops.
Let’s examine those steps:
Step 1: Preparation
When painting your countertops, preparation is about having all the materials you think you’ll need. The tools and materials you use when painting your countertops influence the results. Here are the things to do in the preparation phase.
Get All Your Tools Ready.
You will have to research the best kind of paint to use for countertops. Besides that, there are tools that you will need to make your work easier. You can also purchase a countertop painting kit.
- Scouring pads
- Scissors
- Painters tape
- Gloves
- Caulk
- Trays
- Sandpaper (600 grit)
- Artists paintbrush
- Utility knife
- Countertop painting kit
Prepare Your Countertops
When you have all the tools ready, you can prepare the countertop that you plan to paint. The first thing to do is to ensure that you cleanse your countertops. The goal is to remove all traces of grease and dirt.
Ensure that you dry the counters off evenly and adequately and give them sufficient time to air dry. Once completely dry, remove the old caulk. That’s where a utility knife and caulk remover will become helpful.
Cover Any Items Near the Countertops
After preparing your countertops, the next thing you have to do is cover up any parts around the space where you are painting with tape and newspaper. Take extra care to cover delicate parts, especially around the sink.
Step 2: Start applying coat by coat
The next step involves the application of the primer and minerals. You have to follow specific directions and techniques with these steps. Otherwise, the result will be something unexpected.
Prime Your Countertop
When it’s time to apply the primer on your countertops, you should start from the back and proceed to the front.
Your technique should involve long strokes in the same direction. Once done, step away for 8 hours to give the primer time to dry.
Get a Sponge and Apply the First Coat of Paint
A sponge is an essential item in the painting process. It comes with the kit, and all you have to do is size it into various pieces. When it’s time to use the sponge, you can go ahead and start with the more significant bits. Also, ensure that you soak your sponge in cool water and squeeze it properly before using it.
Dip the sponge in paint, practice first on a practice sheet, and then use it on the countertop when ready. Use the dabbing motion and get creative with the patterns. You will use a single paint color in this step.
Apply Mineral Again
The second coat of paint requires that you use a clean tray. Do it in the same manner as you did with the first coat. You choose a different color in this step. Ensure that you make unique patterns that are nowhere close to the ones you used in the first coat
Once done with the second coat of mineral paint, you can get to the third one using a different shade. The goal is to achieve a realistic look that comes as a result of overlapping all the shades.
Step 3: Get Into Detail With It
The third step should bring you closer to the end. It presents an opportunity to create veins which is a primary characteristic of marble countertops.
Create Veins
When creating veins, it would be helpful to source your inspiration from the real thing. A paintbrush is useful when you want to make the best imitation. It takes about four hours for the veins to dry, so take that time to prepare for the remaining work.
Sand the Countertop
Once it’s dry, you can use sandpaper on the painted parts. Ensure that you use gentle force. The goal is to smoothen out the patterns created by the sponge.
As you sand the top of the counter, you will discover that it gives the top coat a texture. Before proceeding, go ahead and wipe off all the debris.
Apply Top Coat and Sand It Again
Apply a clear topcoat after wiping off the dust using a foam brush. It will do you good to work fast since the coat is fast drying.
After drying, you can sand the countertop one last time to give the clear coat a glossy finish. When done, use a damp cloth to wipe the dust.
Step 4: Finalize the Process
With all those steps done, you can finish the work. This final step determines how good the final product looks.
Second Layer of Top Coat
The first part of the final step involves applying a second layer. You can follow the style you used in applying the first coat.
It’s essential to finish up with a final long stroke to even out the movement. You can finally cover the countertop and leave it to dry.
Remove Tape Once Dry
Before removing the tape, you can test if the second coat is dry using a finger. If it’s dry, you can use a knife to remove the painter’s tape.
Watch out so as not to peel off any paint. However, if that happens, you can repaint. Still, it’s best to avoid repainting to avoid ruining your masterpiece.
Fresh Caulk Application
The final thing you have to do is apply an afresh layer of caulk. Ensure that the layer you create is long, especially around the seams. Please select the best caulk for countertops for the best results and give it time to dry for about two weeks.
Final Words
Painting your countertops is the cheapest and most reliable way to bring a new look into your space. Rather than buying new countertops, all you have to do is get new paint supplies and apply them to your countertops. The good news is that you now understand the process of how to paint your countertops.
Related Posts: