Are you dealing with a squeaky stair or extra loose screws on the stairs of your home? Or maybe you’re dealing with some rotten wood or evidence of insect infestation?
If so, fixing these issues is likely something on your mind.
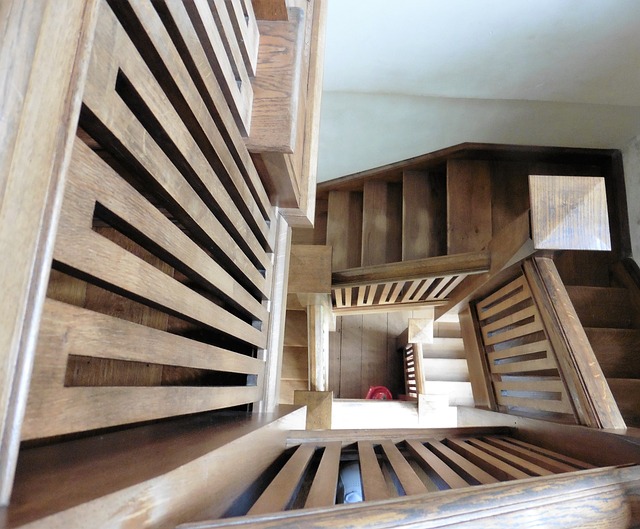
Wooden stairs require regular maintenance and repair work to ensure they are safe and long-lasting, but this can be daunting when it comes to tackling these projects yourself. Fortunately, this article has compiled a list of DIY tips for repairing wooden stairs – so anyone can tackle this challenge without hiring professionals. Read on for simple steps and easy tricks that will help bring new life to any staircase.
Assess the damage
Repairing a wooden stair can seem impossible – whether a broken tread or general wear-and-tear. But it doesn’t have to be a cause for alarm. Once you assess the damage—looking out for splintering, breaks, cracks, and any other signs of general wear—you’ll better understand how to approach the repair project. You will know what wooden stair parts you need and the best methods to approach the repair. With the right tools and materials, you can confidently tackle each part of the staircase.
Gather suitable materials.
Once you’ve identified the problematic areas on your wooden stair, ensure you have all the necessary materials to repair it. Investing in a heavy-duty hammer, along with a few nails and extra glue, will ensure that your repair job is done right. Make sure to pick up some sandpaper as well – this will be useful for smoothing out warped wood sections and eliminating splinters. Finally, gather sawdust from your local hardware store; this will act as filler for any gouges or holes that need to be covered. Now you can begin the process of fixing your wooden stair.
Sand down any rough patches
Having wooden stairs can be a great aesthetic addition to any home, but they come with their fair share of maintenance. A simple way of getting started is by sanding down any rough patches that may have resulted from wear and tear over time. Taking some fine-grit sandpaper and gently rubbing the affected area is usually enough to create a smooth surface again, ensuring it isn’t hazardous. If you’re worried about losing the natural grain pattern, there’s no need – it’s an easy process and won’t cause any damage to your stairway or its beautiful look.
Glue and nail any separated boards
Seeing boards that have separated on your wooden stair can be a concerning sight. Fortunately, the repair is relatively easy – all you need is wood glue and nails for an adequate bond. Start by applying much wood glue to each side of the separation and then firmly press them together. Once you’ve done this, you can use two or three nails as screws through the pre-existing nail holes of each board and hammer them into one another until they are adequately secured in place. This will ensure that each board is snugly fastened, preventing any other boards from separating. Overall, taking a few extra minutes to do this can help save time, money, and worries in the long run.
Fill in cracks and splinters with sawdust.
Filling cracks and splinters with sawdust is an easy yet effective way of fixing most issues with wooden stairs. To do this, mix some sawdust with solid wood glue – you can use readied-made sawdust fillers available at most home improvement stores or save time and create your mixture. Once everything’s been combined well, and an even texture achieved, insert the mixture into the crack or splinter in question and then sand down until it blends perfectly with the rest of the stairs – simple! Don’t underestimate how far this remedy can enhance your stair’s lifespan.
Stain and seal your stairs
If you’ve completed the rather arduous job of repairing a wooden stair, don’t forget to finish it correctly and protect your handiwork from further damage: stain and seal it. Staining and sealing help with both visual aesthetics and making sure your wood is protected from the elements, not to mention protecting dust, dirt, or other particles that can scratch and damage the wood over time. There are a few key steps when staining and sealing: choose quality materials that suit the type of wood in question, apply in thin coats for an even finish, and let dry thoroughly between each coat. Finally, don’t forget the sealant, specially designed for this kind of protection. With these helpful tips, you will have finished your repair job on an outstanding note.
Repairing a wooden stair can be daunting, but with the suitable materials and techniques, you can restore your stair to its former glory. Remember that safety is vital when attempting to repair stairs, so never compromise your safety to complete a repair job. If repairs are too extensive or beyond your skill set, it is always better to contact professionals who can help ensure the job is done correctly.
Related Posts:
- Cheap Ways To Repair and Maintain Expensive Carpets
- Ways to Strengthen the Foundations of Your Home
- Learn How To Do These 6 Basic Home Repairs Yourself
- Master The Art Of Plumbing Repair With These Tips
- How to Hire the Right Plumbing Service for Toilet Repairs and Replacements?