When it comes to choosing nail polish, the options are endless, with an array of colours and shades available. From vibrant reds to delicate pinks, there is a nail polish shade suitable for every occasion.
One particular colour that has gained popularity in the beauty industry is Milky White. This soft and subtle shade adds a glam touch to any look, making it perfect for those seeking to switch up their nail game. Milky white nails not only look great with any outfit but speak greatly of the sophisticated personality of the person wearing them. In this blog post, we will delve into achieving the Milky White nail polish look.
Preparing Your Nails
Prior to applying any nail polish, it is crucial to prepare your nails for a long-lasting application. Start by removing any existing nail polish using an acetone remover, as acetone-based removers can be harsh on your nails and may cause dryness and breakage.
Once you’ve cleaned your nails, it’s time to shape and file them. Use a nail file to shape your nails according to your preference, whether you prefer a round square or something in between. Remember to file in one direction in order to prevent the weakening or splitting of the nails.
Next, take some time to push back your cuticles gently. You can use either a cuticle pusher or a wooden orange stick for this task. This next step serves two purposes: it enhances the appearance of your nails. Provides a base for the Milky White polish.
Applying the Milky White Nail Polish
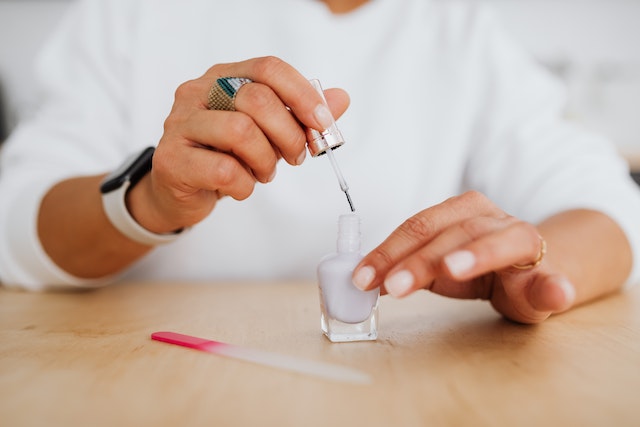
Now that your nails are prepared, it’s time to put on the Milky White nail polish. Start by applying a protective base coat to shield your nails from staining and extend the life of your polish.
Once the base coat is dry, it’s time to apply the Milky White nail polish. Before application, give the bottle a shake to ensure a distribution of color. Begin at the cuticle. Use strokes to apply a thin layer of Milky White polish. Avoid application. Going over the same area repeatedly can result in streaks and an uneven finish.
Allow the coat of polish to dry completely before applying a coat. Opting for two coats ensures coverage and opacity. Allow drying time before proceeding.
An additional tip: If you are bored of trying milky white nails, go for those bold orange colours on your nails. Orange is the colour of the season. So, try them today without any hesitation.
Final Touches
To complete your Milky White nail look, add a coat. This not only provides shine but seals and protects your polish.
To achieve a Milky White nail look, here’s what you need to do:
- Start by applying a layer of coat beginning at the cuticle and moving towards the tip of your nail. Remember to cover the edges to prevent any chipping.
- Once the top coat is dry, it’s time to give your nails some shine and hydration. Massage some cuticle oil or nourishing oil into your cuticles. This step ensures that your cuticles stay healthy and well-hydrated.
- Maintaining your Milky White nail polish is crucial for lasting results. When engaging in household chores or using chemicals, it’s advisable to wear gloves since they can cause chipping or fading of the polish. Additionally, refrain from using your nails as tools to avoid chips or breaks. Look for other tips and tricks to maintain your milk-white nails.
- If you notice any chips or imperfections in your Milky White polish, simply touch them up by applying a layer of polish followed by a coat. This will help extend the life of your manicure while keeping your nails looking fresh and polished.
Conclusion
Milky White nail polish is an elegant shade that has the power to enhance any look effortlessly. By following these steps—prepping your nails properly, applying layers of polish, and adding finishing touches, like a coat and cuticle oil—you can achieve that perfect Milky White nail appearance.
With upkeep, you can keep your Milky White manicure looking fabulous for days, giving you the opportunity to flaunt your sense of style and elegance. Feel free to give Milky White a shot and revel in the classy and allure it adds to your nails.